Tech Newbie: My React Exam Project

Getting into Tech was a dream that became a reality in April 2022 when I enrolled on the AltSchool Software Engineering program. The first semester was an exciting ride. I learned new languages(HTML, CSS, JavaScript), met amazing people and created my first-ever website! Then came the second semester with the introduction to React. I was overwhelmed with the new knowledge. I wasn’t confident in my JavaScript skills. I felt like an absolute beginner; for a whole week, all I knew was how to run “npx create-react-app my-app” in my terminal. Fortunately, with the comprehensive curriculum AltSchool provides, I was motivated to conquer my fears.
OVERVIEW
For the second semester examination in AltSchool, our instructor challenged us to put our knowledge to the test by building a React website. I was excited to challenge myself and finally feel confident as a front-end developer.
The challenge was to create a fully responsive website with a beautiful UI and implement some functionalities.
SETUP
One of my best practices as a front-end developer is to write out a plan before the start of a project. It enables me to stay on course, track my progress and follow my schedule.
DESIGN
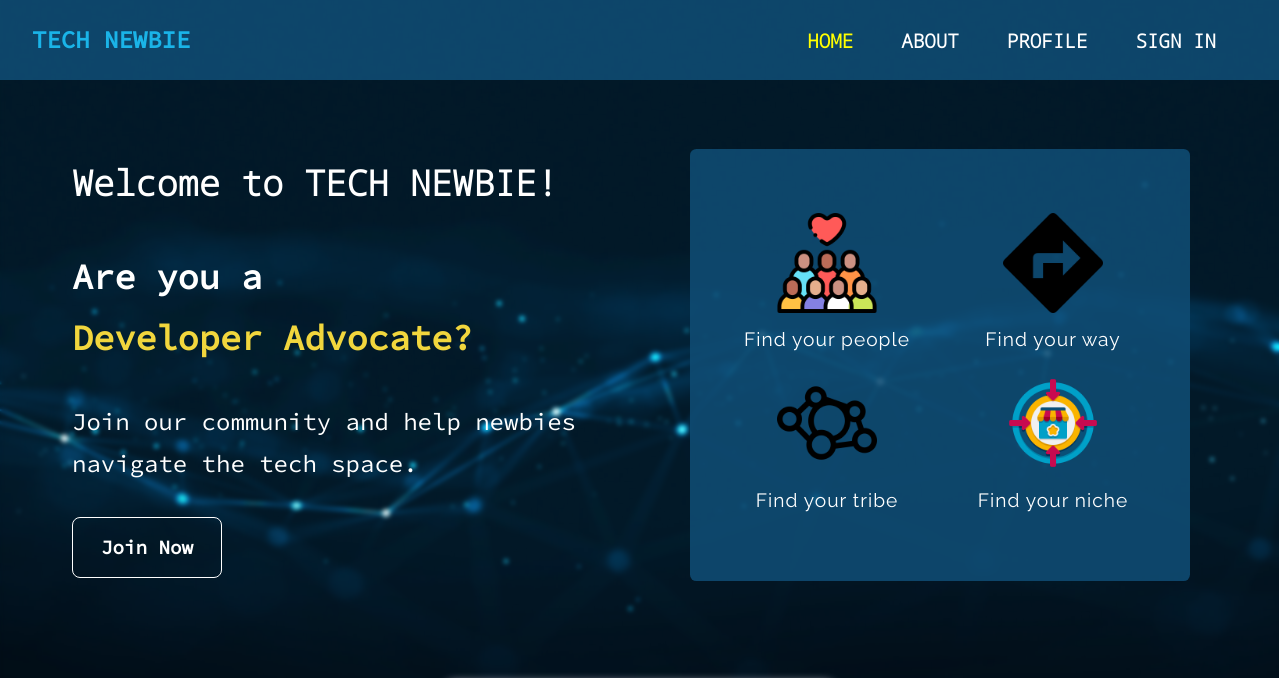
Initially, I planned to use a design from Figma, but I realized it was better to design the page from scratch since Tech Newbie is a platform for newbies, why not maintain a simple UI/UX that beginners could relate to? So I found a dark tech image on Shutterstock to use as my background image, implement some animations with CSS and follow a blue colour scheme.
DEVELOPMENT
To successfully build a React project, you’ll need a code editor and a browser. I used the Visual Studio code since I already have it installed on my PC.
To start my React project, I ran this code on my terminal.
npx create-react-app tech-newbie-app
then,
cd tech-newbie-app
and,
npm start
After running these commands on my terminal the app opened in my browser in the local host:3000.
Next was to install the necessary dependencies for my React project such as react-router-dom, react-error-boundary, and react-helmet-async.
{
  "name": "tech-newbie-app",
  "version": "0.1.0",
  "private": true,
  "dependencies": {
    "@testing-library/jest-dom": "^5.16.5",
    "@testing-library/react": "^13.4.0",
    "@testing-library/user-event": "^13.5.0",
    "react": "^18.2.0",
    "react-dom": "^18.2.0",
    "react-error-boundary": "^3.1.4",
    "react-helmet-async": "^1.3.0",
    "react-icons": "^4.6.0",
    "react-router-dom": "^6.4.3",
    "react-scripts": "5.0.1",
    "web-vitals": "^2.1.4"
  }
Then I imported Route and Routes in my App.js file
import { Routes, Route } from "react-router-dom";
Next, I wrapped all the pages with the Routes element and implemented nested routing on my home page in my App.js file.
<Routes>
            <Route path="/">
              <Route index element={<Home />} />
              <Route path=":id" element={<SignUp />} />
            </Route>
            <Route path="about" element={<About />} />
            <Route
              path="/profile"
              element={
                <RequireUserAuth>
                  <Profile />
                </RequireUserAuth>
              }
            />
            <Route path="/signin" element={<SignIn />} />
            <Route path="*" element={<Page404 />} />
          </Routes>
To implement the protected route functionality, I chose to protect the profile page and require authentication from users.
            <Route
              path="/profile"
              element={
                <RequireUserAuth>
                  <Profile />
                </RequireUserAuth>
              }
            />
To enable login, I set up a fake userAuthContext to always carry out fake authentication using the Auth Provider element. Then I wrapped the entire app with it.
<AuthProvider>
          <NavBar />
          <Routes>
            <Route path="/">
              <Route index element={<Home />} />
              <Route path=":id" element={<SignUp />} />
            </Route>
            <Route path="about" element={<About />} />
            <Route
              path="/profile"
              element={
                <RequireUserAuth>
                  <Profile />
                </RequireUserAuth>
              }
            />
            <Route path="/signin" element={<SignIn />} />
            <Route path="*" element={<Page404 />} />
          </Routes>
          <Footer />
        </AuthProvider>
Error boundaries catch JavaScript errors anywhere and display a fallback UI instead of the component tree that crashed, you can read more here. First I imported it into my App.js file,
import { ErrorBoundary } from "react-error-boundary";
then, I wrapped it with the entire app
<ErrorBoundary FallbackComponent={Fallback}>
        <AuthProvider>
          <NavBar />
          <Routes>
            <Route path="/">
              <Route index element={<Home />} />
              <Route path=":id" element={<SignUp />} />
            </Route>
            <Route path="about" element={<About />} />
            <Route
              path="/profile"
              element={
                <RequireUserAuth>
                  <Profile />
                </RequireUserAuth>
              }
            />
            <Route path="/signin" element={<SignIn />} />
            <Route path="*" element={<Page404 />} />
          </Routes>
          <Footer />
        </AuthProvider>
</ErrorBoundary>
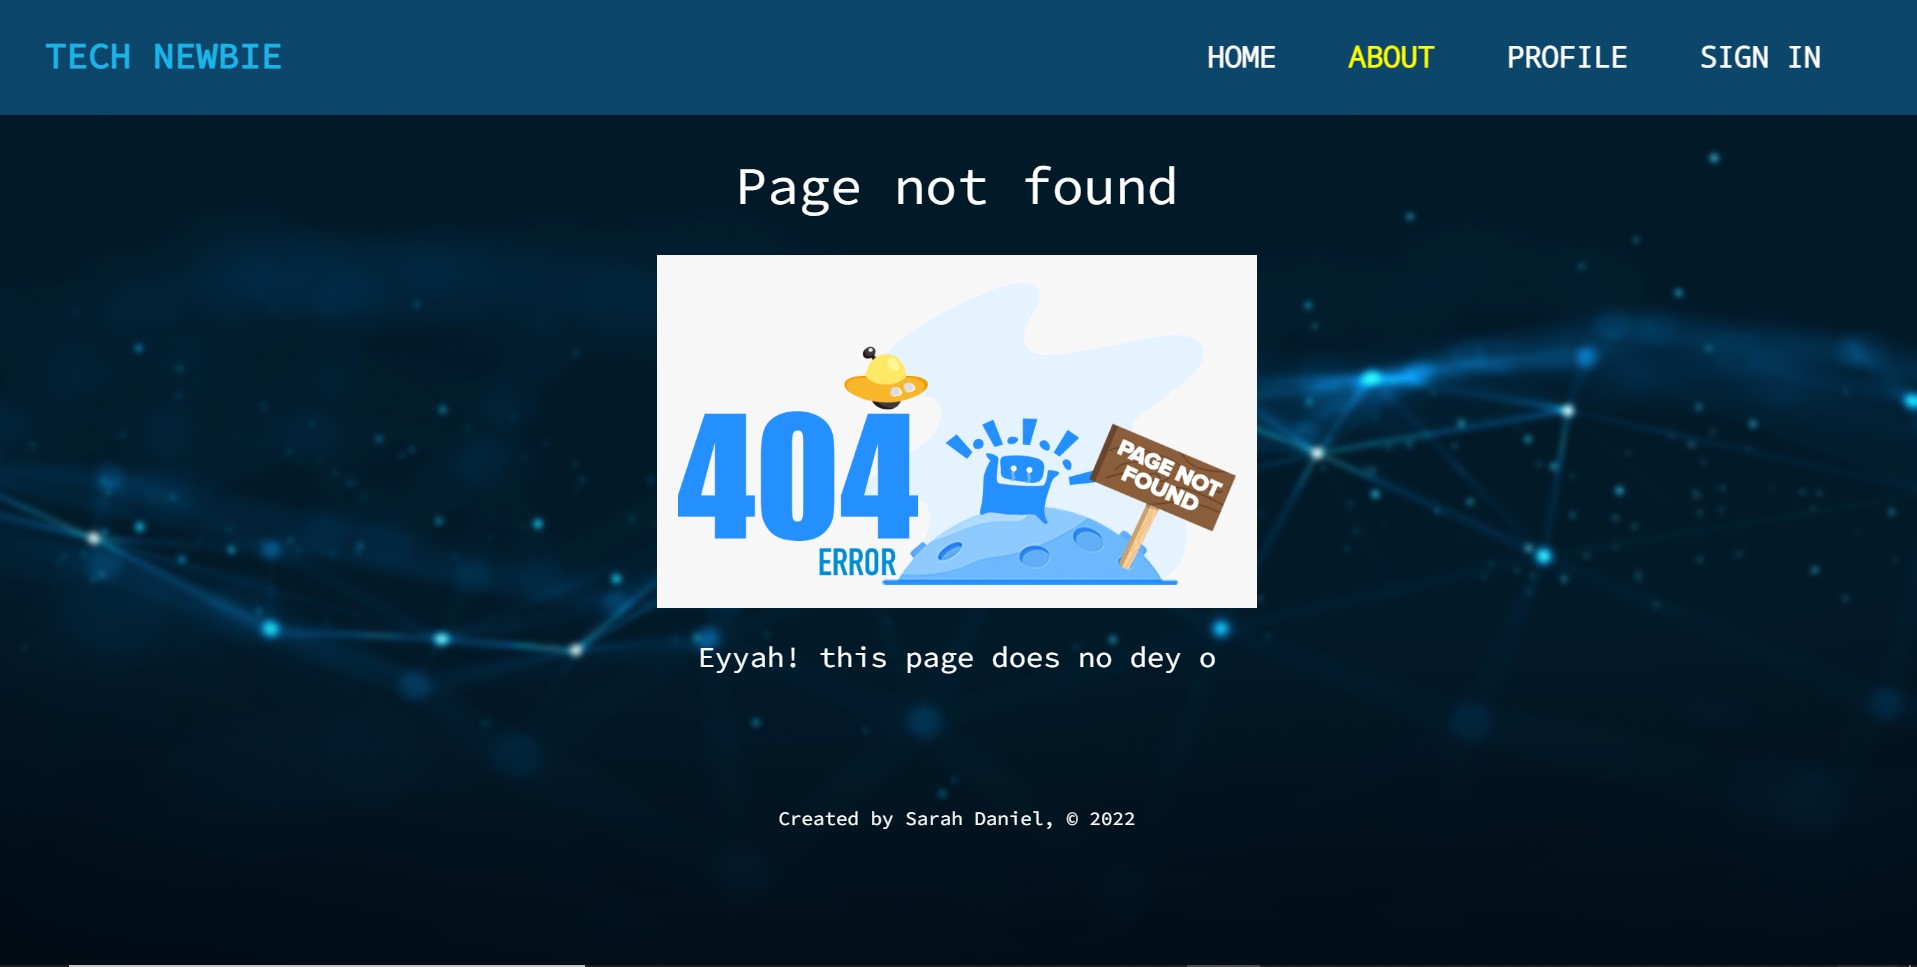
404 page
This is simply a landing page that tells your users the requested page is unavailable or, doesn’t exist. I found a cool image on the internet and added a bit of humour in the message using pidgin (vernacular in Nigeria)
Search engine optimization(SEO)
First I imported the helmet provider element into my index.js file
import { HelmetProvider } from 'react-helmet-async';
Then, I wrapped it around the App
    <HelmetProvider>
        <App />
    </HelmetProvider>
To improve search optimization, I included it across all pages by importing it into the individual pages
import { Helmet } from "react-helmet-async";
and added the Helmet element inside the main div of the page
     <Helmet>
        <title>Home</title>
        <meta name="description" content="Home page" />
        <link rel="canonical" href="/home" />
      </Helmet>
DEPLOYMENT
To deploy my website, I used Vercel. It is free and very easy to use since deployments are handled through Git repositories. You need to create a repository for your project on your GitHub profile. After which, you’ll link your GitHub to your Vercel account. After deployment, you’ll get a link added to the details of your project, you can copy this link and share it with the world to see the magic you created!
CONCLUSION
This project has made me gain confidence as a developer which was something I struggled with in the second semester. It was a huge opportunity to learn, practice and learn again and again. Google and YouTube were my best friends, and I believe most developers would agree with me.
I will continue to develop my skills and learn better methods for building React projects. I hope that one day, Tech Newbie would become a real community for people starting in tech.
You can access the live link here and the code on GitHub here.
I’m open to hearing your feedback on what I could improve. This is my first blog but I promise it wouldn’t be my last. I intend to document my experiences as a Tech Newbie.
Thanks for reading!